
TL;DR:
- Booking a flight online requires verifying the total price, including taxes and fees, before payment. Consumers should compare options on a flight comparison tool, choose direct channels for complex trips, and enter accurate passenger details to avoid issues. Using comparison sites like Pilottraveldeals aids in finding the best deals while understanding airline and support policies.
To book a flight ticket online, you need five steps: search for flights, choose your itinerary, enter passenger details, pay, and confirm. Before you press anything, know two things the U.S. government guarantees you: the DOT requires that every advertised airfare shows the total price including taxes and mandatory fees, and most carriers offer a 24-hour window to cancel or rebook without penalty. Pilottraveldeals pulls deals from multiple providers into one place, so you can compare options before committing to any channel.
TL;DR: Search → choose → enter passenger details → pay → confirm and check in.
- Search on a comparison tool like Pilottraveldeals to see the full market.
- Pick your itinerary only after checking the total price, not just the base fare.
- Enter your name exactly as it appears on your passport or government ID.
- Pay with a credit card for the strongest consumer protection.
- Confirm your booking number (PNR) arrives by email before closing the tab.
Table of Contents
- How can I book my flight ticket online, step by step?
- Which booking channel should you use?
- What fees and charges appear during checkout?
- How do I find the cheapest airline tickets and avoid traps?
- What should you do right after booking?
- U.S. consumer protections that apply when you book online
- Key Takeaways
- The booking shortcut our team actually uses
- Pilottraveldeals puts the full market in one search
- Useful sources
How can I book my flight ticket online, step by step?
The full booking flow typically takes a short amount of time when you have your documents ready. Prepare your passport, email address, phone number, and payment card before you start — dropped transactions and data errors almost always happen when travelers scramble for details mid-checkout.
Step 1: Set your search inputs
Enter your origin city or airport code, destination, travel dates, number of travelers, and cabin class. If your dates are flexible, toggle the flexible-date or calendar view — fares can shift noticeably across a week. For domestic trips, check nearby airports too; flying into a secondary airport some distance from your destination sometimes cuts the fare significantly.
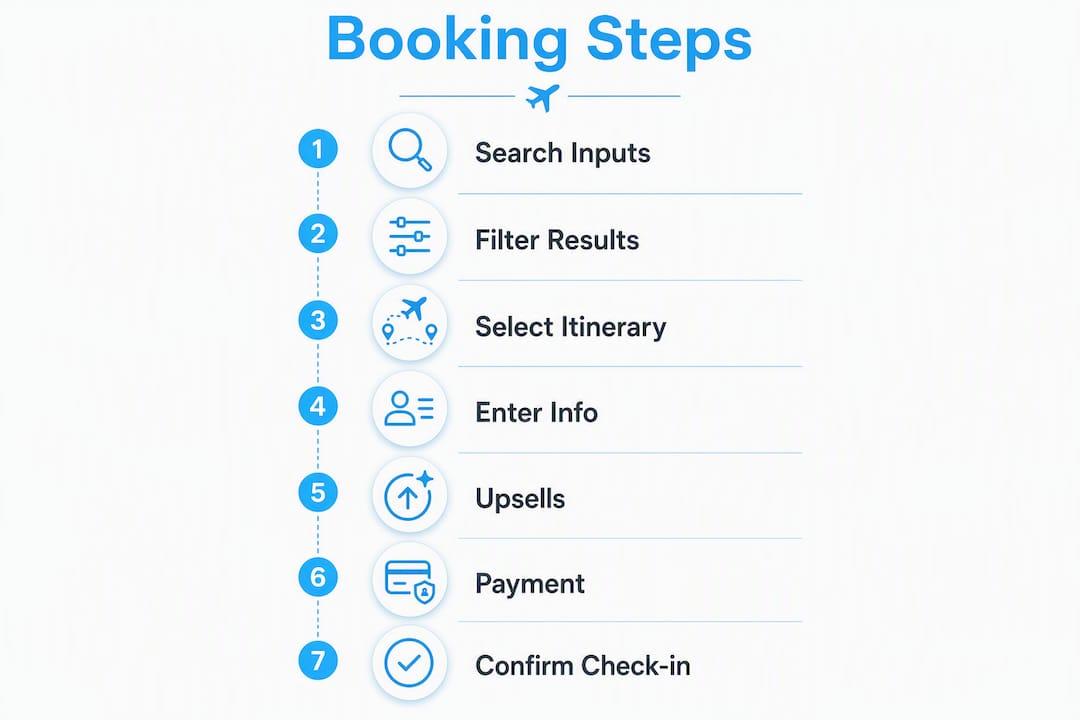
Step 2: Filter and read the results
Sort by total price, not just the headline number. Use stop filters to limit connections, and pay attention to layover length — anything under 60 minutes on a domestic connection or 90 minutes internationally is risky. Watch for codeshare warnings: airlines must disclose the operating carrier on the first screen after a search, not buried in a pop-up. If the ticket says “operated by” a different airline, that carrier’s rules govern your experience.

Step 3: Select your itinerary
Before clicking “select,” check total flight time, connection airports, and whether the ticket is a single protected itinerary or two separate tickets sold together. A single itinerary means the airline is responsible if a connection is missed. Two separate tickets means you bear that risk yourself.
Step 4: Enter passenger information
Type your name exactly as it appears on your travel document — middle name included if it’s on your passport. For international flights, you’ll also enter your passport number, nationality, expiration date, and date of birth. One character off can trigger a fee or a denied boarding.
Step 5: Navigate the upsells
After passenger info, most booking flows present add-ons: checked bags, seat selection, priority boarding, and travel protection. Booking flows commonly present paid bundles and seat choices after collecting your contact details, which can make backtracking to compare fares feel inconvenient. Decide in advance what you actually need. A basic economy fare with one checked bag can cost more than a standard fare that includes it.
Step 6: Pay
Most platforms accept major credit cards, debit cards, and digital wallets. Credit cards offer the best dispute protection if something goes wrong. If a payment fails, wait 60 seconds and retry once — double-submitting can result in a duplicate charge. Check your bank app before trying a second card.
Step 7: Confirm and check in
Your confirmation email should arrive within minutes and include your PNR (Passenger Name Record) or record locator, the full itinerary, fare rules, and baggage allowance. Save it. Online check-in typically opens 24 hours before departure for domestic flights and 24–48 hours for international. Download your boarding pass to your phone’s wallet app so you’re not hunting for a PDF at the gate.
Pro Tip: Create an airline account before booking rather than checking out as a guest. Airline accounts let you access and modify reservations directly, while OTA guest bookings often require contacting the agent first — a real problem when a flight changes at 11 PM.
Which booking channel should you use?
Three types of channels exist for purchasing plane tickets online: airline websites (direct), online travel agencies (OTAs), and metasearch engines. Each serves a different purpose, and picking the wrong one for your trip type costs you either money or time.
Airline websites sell tickets directly from the carrier. You get the clearest fare rules, the easiest post-booking support, and direct access to loyalty points. The downside is you’re only seeing one airline’s inventory at a time.
OTAs aggregate inventory from multiple airlines and often bundle hotels, car rentals, and activities. They’re convenient for simple trips where you want everything in one place. The catch: when you book through a third-party agent, the airline may limit direct assistance, and your first call for refunds or changes goes to the OTA, not the carrier.
Metasearch engines don’t sell tickets — they compare prices across airlines and OTAs and redirect you to book elsewhere. Use them for price discovery. They’re the fastest way to see the full market before deciding where to actually buy.
| Channel | Best for | Post-booking support | Price transparency | Ease of use |
|---|---|---|---|---|
| Airline direct | Complex/international routes, loyalty benefits | Highest (direct with carrier) | High (total fare shown) | Moderate |
| OTA | Simple domestic trips, bundled packages | Via OTA first, then airline | Varies by platform | High |
| Metasearch | Price discovery, broad comparison | Redirects to seller | High (side-by-side) | High |
For how to book international flights or multi-leg itineraries, travel experts recommend booking direct with the operating carrier. Changes and rebooking are far simpler when the airline owns your reservation. For a quick domestic round-trip where price is the only variable, metasearch first, then buy direct or through a trusted OTA.
Choosing your channel — quick checklist:
- Multi-leg or international trip? Book direct with the airline.
- Price-shopping across many routes? Start with a metasearch or travel comparison sites.
- Want a bundled hotel and flight deal? An OTA may save you time, but read the refund policy first.
- Earning frequent flyer miles? Book direct or confirm the OTA credits miles to your account.
- Tight budget, simple route? Compare on metasearch, then check if the airline’s own site matches the price.
What fees and charges appear during checkout?
The base fare is rarely what you pay. Understanding what’s mandatory versus optional is the difference between a good deal and a frustrating surprise at the gate.
The DOT rule on total fares is clear: any airfare advertised on a website, in an email, or during the booking process must include government taxes, mandatory fees, and any required carrier surcharges. If a site shows you a $79 fare and the total at checkout is $147, the $68 difference should be taxes and fees that were always part of the price — not a bait-and-switch. What the rule does not cover are optional fees you choose to add.
DOT consumer protection: Advertised airfares must display the total price the consumer will pay, including all government taxes and mandatory carrier-imposed fees — no exceptions for websites, emails, or booking flows.
Optional fees that commonly appear mid-checkout:
- Checked baggage: $30–$40 per bag on most U.S. carriers for the first checked bag on basic economy fares.
- Seat selection: Free seats exist on most flights, but preferred or extra-legroom seats carry fees.
- Change and cancellation fees: Basic economy fares on many carriers are non-refundable and non-changeable.
- Priority boarding: Usually $10–$25 and rarely worth it unless you have a large carry-on.
- Travel protection/insurance: Offered by the platform, not the airline — read what it actually covers before buying.
Pre-payment checklist:
- Is the total price shown inclusive of all taxes and mandatory fees?
- Have you decided on bags before checkout so you’re not pressured mid-flow?
- Did you compare the same add-ons across fares? A cheaper base fare can become more expensive once baggage is added.
- Is the seat assignment included or extra?
- Does the fare allow changes, or is it fully non-refundable?
Pro Tip: When comparing fares across channels, match the same add-ons — seat selection, baggage, and change flexibility — on every option. A price difference can disappear quickly when one fare includes a checked bag and the other doesn’t.
How do I find the cheapest airline tickets and avoid traps?
Price is where most travelers either win or get played. The tactics that actually move the needle are simpler than most people think.
Tactics that work:
- Flexible dates: Shifting a trip by even one or two days can drop fares noticeably. Mid-week departures (Tuesday, Wednesday) tend to be cheaper than Friday or Sunday.
- Nearby airports: Search both origin and destination alternatives. Flying out of a secondary airport can cut costs, though factor in ground transportation.
- Fare alerts: Set a price alert on a metasearch tool for your route. You’ll get notified when the fare drops instead of checking manually every day.
- Loyalty accounts: Even occasional flyers benefit from a free frequent flyer account. Miles accumulate, and status perks (free bags, upgrades) reduce the real cost of flying.
- Bundle only when it saves money: Hotel and flight bundles through OTAs can be cheaper than booking separately, but run the numbers. Sometimes the “deal” is just a discount on the hotel that you could find independently.
For more cheap airfare tactics, the timing of your search matters too — booking 6–8 weeks out for domestic and 3–6 months out for international is a widely cited sweet spot, though fares vary by route and season.
Common traps:
Misleading low base fares are the oldest trick. A $49 fare that requires two checked bags and a seat assignment ends up at $130. Self-transfer itineraries — two separate tickets sold as a connecting trip — look cheap but leave you stranded if the first flight is late. Dynamic pricing can also push fares up mid-checkout if you leave the page open too long; always refresh before paying.
The 24-hour monitoring move: After booking, monitor the fare for 24 hours. Some airlines and fares allow free cancellation or rebooking within this window if the price drops or you spot an error. Check the carrier’s specific policy — it varies.
Three high-impact moves to apply right now:
- Set a fare alert for your route before committing to any price.
- Compare the best travel websites side by side with identical add-ons before buying.
- Check the fare rules for change/cancel flexibility — paying $20 more for a changeable fare is often worth it.
Pro Tip: Keep a running note as you go through checkout: “base fare + 1 checked bag + seat = $X.” That running total prevents the base-fare illusion from working on you.
What should you do right after booking?
The 24 hours after payment are the most important and most ignored part of the booking process.
Immediate verification steps:
- Locate your PNR or record locator in the confirmation email — it’s usually a 6-character alphanumeric code.
- Check the operating carrier. If the ticket is a codeshare, look up the operating airline’s baggage rules and check-in process separately.
- Verify your name and passport details match your travel document exactly.
- Confirm the departure airport and terminal — some routes use secondary terminals or airports.
- Save the confirmation email and screenshot the itinerary.
Timeline before departure:
Online check-in opens 24 hours before departure for most domestic U.S. flights and 24–48 hours for international. Check in as early as possible — it’s the easiest way to secure a preferred seat at no extra cost. Download your boarding pass to your phone’s wallet app or print it if the airline requires a paper copy.
Expect schedule-change notifications by email. Airlines occasionally adjust departure times by 5–30 minutes; a change over a certain threshold (usually 2+ hours) may entitle you to a free rebooking or refund. Read the notification carefully before accepting any automatic rebooking.
Who to call when something goes wrong:
This depends entirely on how you booked. If you purchased directly from the airline, call the airline. If you booked through an OTA, your first contact is the OTA — the airline may decline to assist directly because the OTA controls the ticket. Keep the OTA’s customer service number saved before you travel.
First 24 hours after booking checklist:
- Confirm PNR received by email.
- Verify name, dates, and airports are correct.
- Check operating carrier and its baggage rules.
- Set a calendar reminder for online check-in.
- Save the OTA or airline customer service number.
U.S. consumer protections that apply when you book online
Two federal rules directly affect how you buy and what you’re owed.
The DOT total-fare rule requires that any airfare shown in advertising — including on websites and in booking flows — must display the complete price the consumer will pay, inclusive of all government taxes and mandatory carrier surcharges. There are no exceptions for “base fare only” displays in the U.S. market. If a site shows you a price that excludes taxes until the final screen, that’s a violation worth reporting to the DOT.
Key protection: The DOT requires that the total fare, including all mandatory taxes and fees, be shown from the first time a price is displayed to the consumer — not just at the final checkout screen.
Codeshare disclosure is a related requirement: airlines must identify the operating carrier on the first screen after a search result, not in a footnote or roll-over. If you’re flying a route operated by a regional partner under a major carrier’s code, you have the right to know that upfront.
The 24-hour monitoring convention is widely practiced but not universally mandated in the same form for every carrier. Many U.S. airlines allow free cancellation within 24 hours of booking for tickets purchased at least 7 days before departure. Check the specific carrier’s policy — some OTAs have their own 24-hour policies that differ from the airline’s.
When you book through a travel agency or OTA, the agency controls the ticket. Refunds and changes flow through them, not the airline. This isn’t a problem until something goes wrong — at which point knowing who owns your ticket matters a lot.
Pro Tip: Document every communication about a booking issue — screenshot the chat, save the email, note the agent’s name and call time. If a dispute escalates to a DOT complaint or a credit card chargeback, that paper trail is your evidence.
This article is general information, not legal or consumer-rights advice. Confirm current DOT rules and your carrier’s specific policies at transportation.gov or with a qualified professional for your situation.
Key Takeaways
Booking a flight ticket online comes down to one principle: verify the total price, not just the base fare, before you pay.
| Point | Details |
|---|---|
| Total fare is your baseline | The DOT requires all mandatory taxes and fees to be included in any advertised airfare — always check the final total. |
| Channel choice matters | Book direct with the airline for complex or international trips; use metasearch for price discovery on simple routes. |
| Passenger data must be exact | Enter your name and passport details exactly as they appear on your travel document to avoid fees or denied boarding. |
| Monitor for 24 hours after booking | Many carriers allow free cancellation or rebooking within 24 hours — check your carrier’s specific policy immediately after purchase. |
| Pilottraveldeals for comparison | Use Pilottraveldeals to compare flight and hotel deals across providers in one place before deciding where to book. |
The booking shortcut our team actually uses
Most travelers treat the booking process as a single task. The team at Pilottraveldeals treats it as two: discovery and purchase. They’re different jobs, and conflating them is where most people overpay.
For discovery, the workflow is metasearch first. Cast a wide net, see the full price range for a route, and note which carriers and fare classes come up consistently. That takes five minutes and gives you a real market baseline. Without it, you’re negotiating blind.
For purchase, the decision rule is simple: if the trip is a straightforward domestic round-trip and the OTA price matches or beats the airline’s own site after adding identical bags and seats, book wherever the total is lower. If the trip is international, multi-leg, or involves a tight connection, book direct. The support difference when something goes wrong is not subtle.
Pilottraveldeals aggregates deals on flights, hotels, bike rentals, and more, with destination guides and tips articles built around the same comparison-first philosophy. The site’s deal aggregation pulls from multiple providers so you can see the spread before committing. For travelers who want the research done for them, that’s the shortcut.
One honest caveat: even after using a comparison tool for discovery, there are cases where booking direct is the right call. A complex international itinerary with multiple carriers, a trip with a tight connection, or any booking where you anticipate needing to change plans — those belong on the airline’s own site. The comparison tool gets you to the right price; the booking channel gets you the right support.
Pilottraveldeals puts the full market in one search
Sorting through dozens of tabs to compare flight prices is the part of trip planning nobody enjoys. Pilottraveldeals cuts that down by aggregating deals on flights, hotels, and travel services from multiple providers, so you see the spread in one place instead of ten.
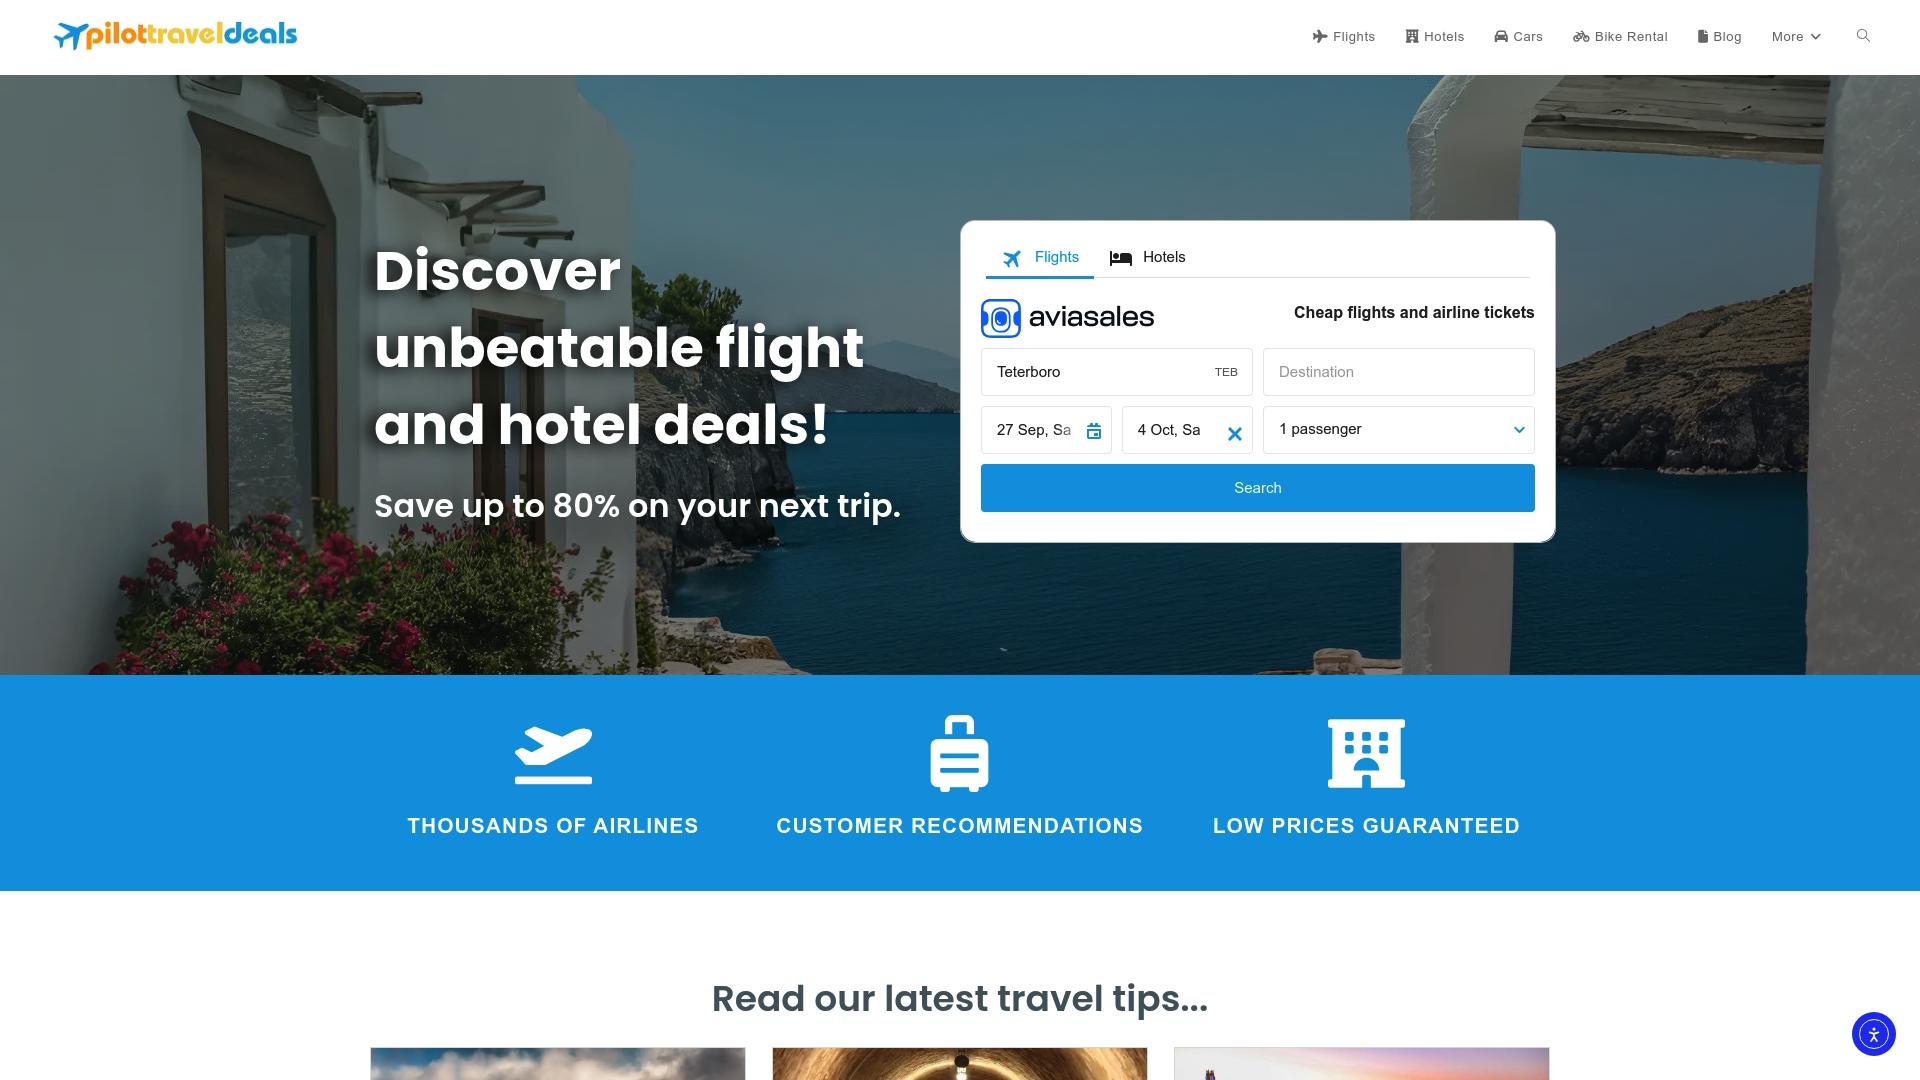
The site’s cheap airfare tips section goes deeper on timing, fare classes, and when bundling actually saves money versus when it doesn’t. No account required to browse deals, and no pressure to book anything until you’re ready. If you’re also sorting out accommodation, the hotel deals page runs the same comparison approach across properties. Start comparing at Pilottraveldeals.com and go into your next booking knowing you’ve seen the full market.
Useful sources
These are the primary and authoritative references used throughout this guide.
| Source | What it covers |
|---|---|
| U.S. Department of Transportation — Buying a Ticket | DOT fare-advertising rules, codeshare disclosure requirements, agency vs. airline support responsibilities |
| wikiHow — How to Book a Flight | Practical step-by-step booking walkthrough including the 24-hour monitoring tip |
| NerdWallet — How to Shop for Flights | Fare comparison tactics, upsell flow warnings, apples-to-apples add-on matching |
| WanderPuls — How to Book a Flight for the First Time | Beginner-focused booking guide, pre-booking document checklist, channel selection advice |
| Flight of Aloha — How to Book Cheap International Flights | Practical tips for finding and booking affordable international airfare |


